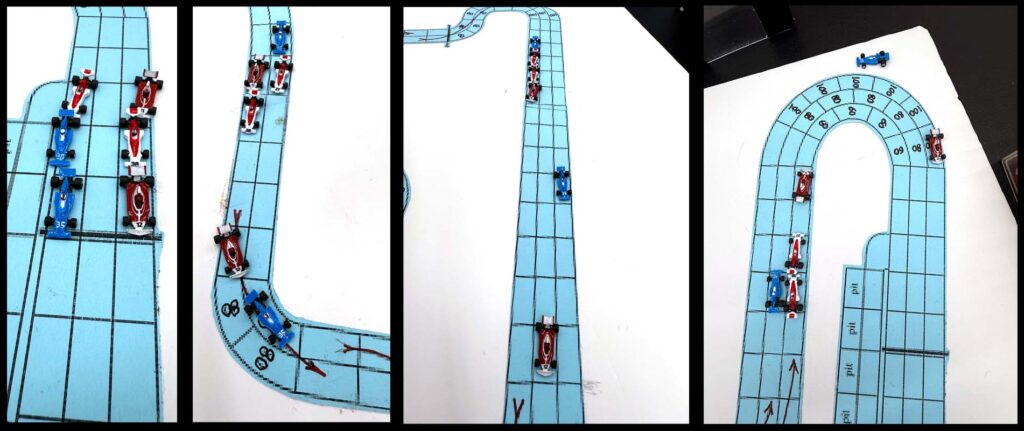
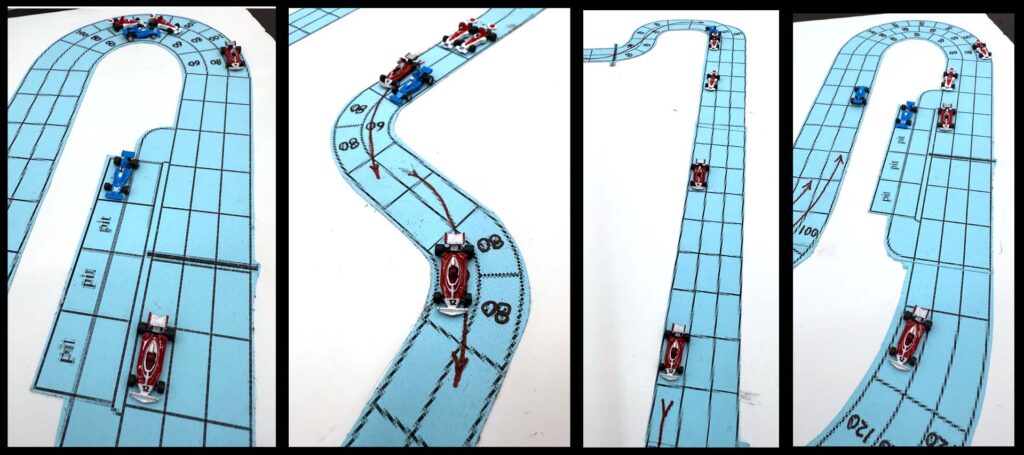
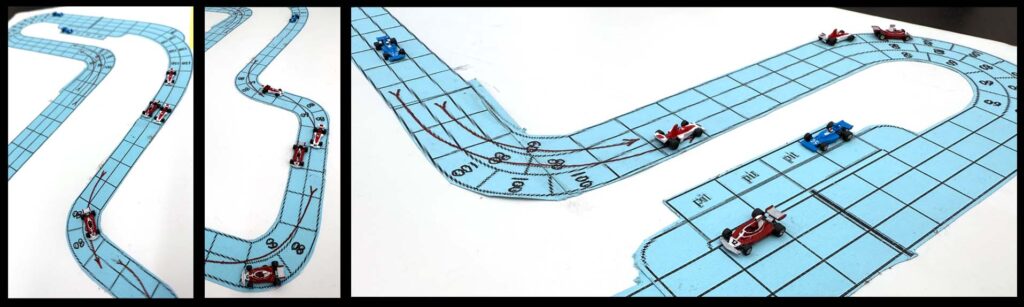
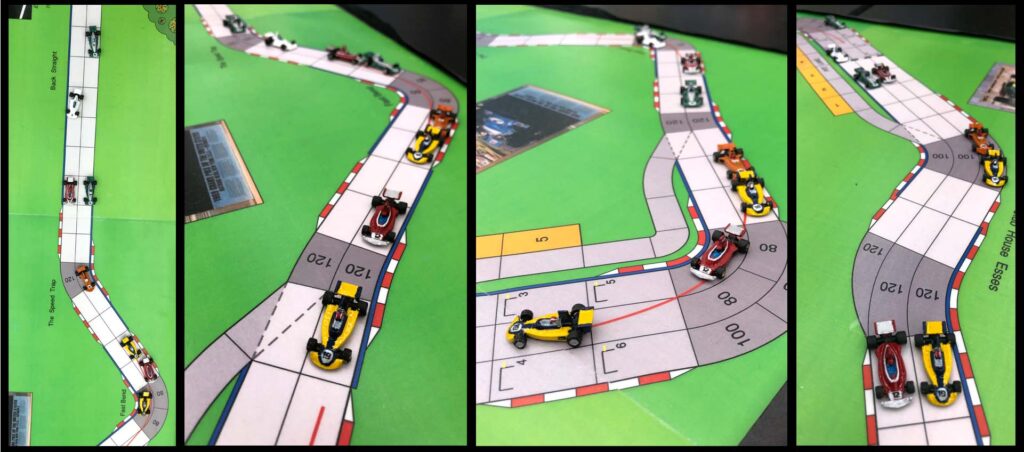
We had not visited the classic Monaco circuit since 2017. Only three teams answered the call to race at the Monaco GP this year.
Maki’s Walker held the poll position at the start sharing the first row with Ferrari’s Lauda. Fushida, in the#36 Maki, and Miller in the #38 Parnelli occupied the second row. The final row was filled by Andretti in the #27 Parnelli and Regazzoni in the #11 Ferrari.
Walker took an early lead and was closely shadowed by Lauda. Regazzoni meticulously weaved his way through the pack and into 3rd. Lauda passed Walker and was first through the tunnel and down the long back straight. Walker attempted to regain the lead in the last corner and crashed out of the race! Luckily he escaped injury and only his pride was hurt.
Lauda started the second lap with an insurmountable lead. Fushida, the remaining Maki driver, pressured Regazzoni for second place, but slipped back and then spun-out in the corner leading to the tunnel. Ferrari finished the second lap holding both 1st and 2nd positions. Andretti set his sites on Regazzoni.
1st Den H. (N. Lauda) 80/40/40/140/5 S ** 2nd Den H. (C. Regazzoni) 60/40/40/140/5 3rd A.J. (E. Miller) 60/40/40/140/5 S 4th Ray R. (Fushida) 40/40/40/160/5 S 5th A.J. (M. Andretti) 60/40/40/140/6 S CRS Ray G. (D. Walker) 60/40/40/160/5 S
I hope you can join us on 7 May 2025 for our inaugural race at Zolder (another fantastic track recreated by Steve K.). Thanks and be seeing you at the races!
Eight teams met in South Africa for this years race at Kyalami fielding 8 cars. Lotus driver Peterson sat on the pole and shared the first row with Ferrari’s Lauda. Walker and Fittapaldi followed in the second row. Andretti and Evans occupied the third row. The final row was held by an anxious Hunt in the #24 Hesketh and Reutemann in the #7 Brabham.
Peterson jumped off the startline and held an early lead. Lauda pursued followed closely by Evans in the blue #35 Maki. The Brabham moved from the last position heading for the front.
Lauda spurred his Ferrari and passed Peterson taking the lead and earning a bonus point for being the first to finish lap one. Andretti and Reutemann increased pressure on Walker in a tense battle for third place.
Lauda pushed the Ferrari in an uncharacteristically reckless manner and the abused vehicle began to falter. Peterson took advantage of Lauda’s negligence to re-capture the lead and gain the second lap’s bonus point. After winning the battle for third, Andretti set his sights on Lauda. Hunt began moving up.
The third and final lap was dominated by Peterson in the Lotus. Lauda failed to fend off Andretti and Hunt. Hunt raced down the front straight ahead of Andretti to secure second place.
Race details follow:
1st Tom V. (J. Ickx) 80/20/40/140/6 W* 2nd Steve K. (J. Hunt) 40/40/40/160/6 S 3rd A.J. (M. Andretti) 60/40/40/160/5 S 4th Den H. (N. Lauda) 80/40/20/160/5 S ** 5th John H. (E. Fittipaldi) 40/40/40/160/6 S 6th Dave M. (C. Reutemann) 40/60/40/160/5 S 7th Ray R. (B. Evans) 40/60/60/140/6 S 8th Ray G. (D. Walker) 60/40/40/160/5 S
McLaren LeadsTeam Championship but Fails To Win Race
Five teams appeared in this season inaugural race at Buenos Aires. Ferarri’s Luada held the pole and was accompanied in the first row by Hesketh’s Lunger. The second row was occupied by Peterson in the Lotus and Hunt in another Hesketh. The remaining Lotus of Ickx and Ferrari of Regazzoni secured the third row while both McLarens (Fittapaldi and Mass) held the last row. Two Maki’s were late to the grid and entered the race from the pits.
Lauda jumped out front and had a substantial lead entering Curva Numero Uno. The lotus’ consolidated their positions behind Lauda. Fittipaldi began fighting his way through the pack.
The field condensed going through the more technical part of the track. Peterson caught Lauda and threatened to take the lead, but would soon be haunted by brake issues that would take him out of contention. Fittipaldi cut his way through the Heskeths and moved into 3rd place.
Lauda and Peterson raced side-by-side, but Lauda got the better of Peterson going through the Curva de Parga Horquilla and finished the lap in the lead. Hunt challenged Fittapaldi for 3rd. Unlike his partner Lauda, Regazzoni had a bad day and skidded before entering the long front straight and fell far behind the pack (and his luck did not improve after that).
During the second lap, Lauda attempted to extend his lead while Peterson fell back as his brakes began to fade. Fittapaldi smelled blood in the water and he passed Peterson and set Lauda in his sites. Hunt tailed Fittapaldi.
Lauda pushed his #12 Ferrari to the limit and finished the second lap with a tremendous lead, but his car was showing signs of wear. Fittapaldi and Hunt continued the joust for 2nd place. Regazzoni spunout in the same corner he skidded in during the previous lap securing last place.
Hunt began to fall off pace and Ickx passed him. Fittapaldi began reeling in Lauda.
Fittapaldi caught Lauda and tried to take the lead going into Parga, but he spunout! Lauda retook the lead and won the race. Fittapaldi recovered in time to hold second place. There was a three-way drag race between Hunt, Mass, and Walker. Walker took 3rd followed by Ickx (who had sprung out from behind the dragsters), and Mass.
Although Ferrari’s Lauda won the race, Team Mclaren earned enough points to start the season in first place.
Race details follow:
1st Den H. (N. Lauda) 80/40/20/160/5 S ** 2nd John H. (E. Fittipaldi) 40/60/20/160/6 S 3rd Ray G. (D. Walker) 60/40/40/160 S 4th Tom V. (J. Ickx) 40/40/40/160/5 W 5th John H. (J. Mass) 40/40/20160/6 S 6th Steve K. (J. Hunt) 60/40/20/160/6 S 7th Ray G. (H. Fushida) 40/40/40/160/5 S 8th Tom V. (R. Peterson) 40/60/40/160/5 S 9th Steve K. (B. Lunger) 60/40/20/160/5 S 10th Den H. (C. Regazzoni) 60/40/20/160/5
The second race of the season is on 5 February 2025 at Kyalami. See you at the races!
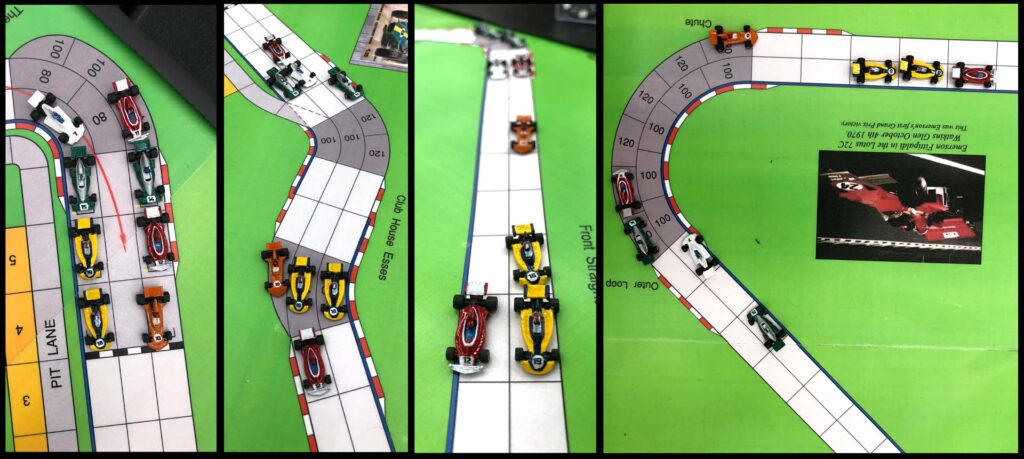
Eight racers participated in this year’s US Grand Prix including Pace and Lauda who battled for the championship.
Pace held pole position and shared the front row with March’s Brambillo. Mass and Lauda occupied the second row followed by the two BRMs driven by Beltoise and Pescarolo. Reuterman and Regazzoni impatiently filled out the last row.
Lauda had a good start and had taken the lead through the Club House Esses. Regazzoni beat the BRMs going into the Outer Loop. Both Surtees drivers were in hat pursuit of the leading Ferrari.
Pace passed Lauda and was first across the start finish line completing the first lap. The March driver, Brambillo battle against Mass for third place. Regazzoni lost a position back to one of the BRMs.
With the championship on the line, Mass and Lauda clawed at each other to stay in the lead. The rest of the field struggled to keep up with them.
Once again Pace regained the lead and finished the second lap ahead of Lauda, collecting another bonus point. Mass and Brambillo tried to stay with the leaders. Then it was Reutermann’s turn to scrap with the BRMs.
Pace stayed in the lead, but he could not shake Lauda. Mass defended himself against Brambillo’s assualt. Brabham’s Reutermann pushed pass the BRMs and slipped by Ragazzoni’s Ferrari. The last lap took a heavy toll on all the cars as they were pushed to their limits.
Lauda dived into the 90 Hard Right, the last corner in the race, ahead of Pace! Lauda bolted across the start finish line to win the race followed by Pace, Mass, and Reutermann. Although he did not win the race, Pace’s second place finish and 2 bonus points secured him the championship finishing 3 points ahead of Lauda.
Congratulations Tom V for managing this year’s Champion driver!!
The manufacture’s championship was awarded to Ferrari. Race details follow:
1st Den H. (C. N. Lauda) 80/40/20/160/5 S 2nd Tom V. (C. Pace) 60/40/20/160/6 S** 3rd Tom V. (J. Mass) 80/20/20/140/6 W 4th Dave K. (V. Brambilla) 60/40/40/160/5 S 5th Dave M. (Reutermann) 40/60/60/160/4 S 6th Den H. (C. Regazzoni) 40/40/40/160/5 S 7th Ray R. (H. Pescarolo) 40/40/40/160/5 S 8th Ray R. (J-P. Beltoise) 60/40/60/160/4 S
Thanks to everyone who participated in this year’s simulation of the 1974 grand prix season. It was a lot of fun. We plan to hold our 15th season in 2025 using the 1975 Grand Prix teams. Please join us if you can. Thanks again.
Only teams Surtees, BRM, and Ferrari showed for this year’s Italian Grand Prix. Ferrari’s Lauda started on pole leading the six car field. Pace also sat on the first row followed by his teammate Mass and Beltoise. Pescarolo and Regazzoni filled the final row.
During the opening moments of the race, Pace, Lauda, and Mass passed Pescarolo. Lauda moved into the lead for a time.
The Ferrari and Surtees drivers battled for the lead for most of the first lap leaving the BRMs behind.
Pace and Mass slipped stream each other working as a team. Mass was first to complete the initial lap. Regazzoni’s Ferrari experienced engine trouble and began to drop back. Pace also lost some engine power, but continued to stay in Mass’ draft. Lauda chased the Surtee’s machines.
During the second lap, team Surtees extended their lead. Lauda tried to close the gap between him and the leaders. Regazzoni unsuccessfully tried to fend off the BRMs. Mass once again was first to complete a lap.
As the final lap progressed, the BRMs surpassed Regazzoni. Mass’ ride ran out of wear and Lauda passed him. Although Lauda closed the gap, he could not pass Pace before Pace was able to win the race.
Race details follow:
1st Tom V. (C. Pace) 40/40/40/180/5 W 2nd Den H. (C. N. Lauda) 60/40/20/160/6 W 3rd Tom V. (J. Mass) 40/40/40/160/5 W** 4th Ray R. (J-P. Beltoise) 60/40/40/180/4 S 5th Ray R. (H. Pescarolo) 40/40/40/180/4 S 6th Den H. (C. Regazzoni) 40/40/20/160/6 S
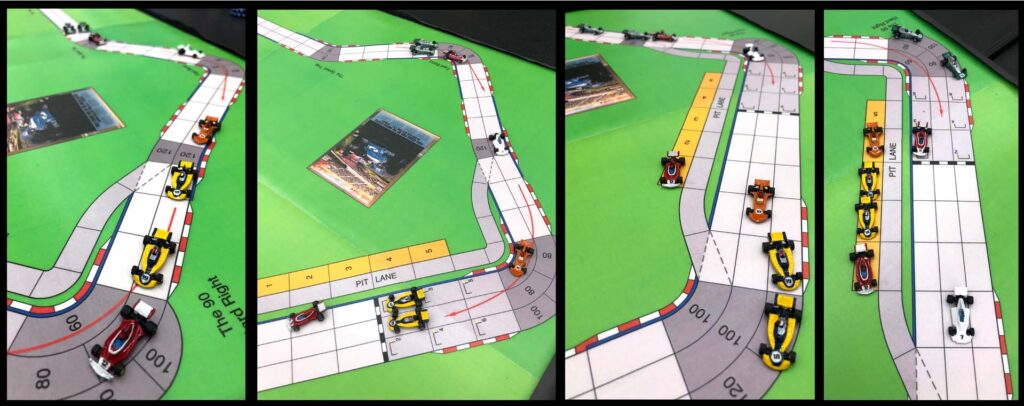
Five teams and a total of ten drivers participated in this season’s Monaco Grand Prix. Teams Surtees and Ferrari occupied the first two rows of the grid and they battled ferociously throughout the race. Scheckter and Edwards started on the third row followed by Beltoise and G. Hill. Pescarolo and Hunt filled out the last row.
Lauda got to the inside of Mass, but he could not hold the lead position and he was soon passed by both Mass and Pace. Pace took the lead from his teammate Mass. Mass stayed behind Pace on the straights and slip streamed him throughout the race. Scheckter put pressure on the Regazzoni.
Luada tried to breakup the Surtees drivers, but he kept getting forced off the racing line. Hunt developed engine trouble and quickly fell out of contention.
Scheckter and G. Hill passed Regazzoni. Team Surtees began to extend their lead. Pace was first across the start finish line for the first lap.
Team Surtees maintained their lead. G. Hill slipped by Lauda and into 3rd.
Pace and Mass gained an insurmountable lead through the tunnel. Lauda and G. Hill battled for third place.
Regazzoni blundered, mis-shifted, and lost two positions. Scheckter spun-out in Virage De La Rascasse. Pace finished first followed by Mass. Lauda managed to get around G. Hill to finish third. Congratulations to Team Surtees’ manager Tom V.!
Race details follow.
1st Tom V. (C. Pace) 40/60/40/160/5 S* 2nd Tom V. (J. Mass) 60/40/40/140/5 S 3rd Den H. (C. N. Lauda) 60/60/20/160/5 S 4th Mike C. (G. Hill) 40/60/60/140/5 N 5th Ray R. (J-P. Beltoise) 40/60/60/140/5 S 6th Den H. (C. Regazzoni) 60/40/40/160/4 N 7th Steve K. (I. Scheckter) 40/40/40/160/5 S 8th Mike C. (Edwards) 40/60/60/140/4 N 9th Ray R. (H. Pescarolo) 40/40/60/140/5 S 10th Steve K. (J. Hunt) 40/40/40/160/6 S
Next race is scheduled for 19 June 2024 at Brands Hatch. See you all at the race.
Use normal speed circuit rules with the following variations.
Teams
If six or less players attend a race, then each player should field 2 cars. If 7 or more players are present, then the players must agree whether 2 cars are allowed. A player may always choose to only field 1 car.
Skill Points.
Each team is assigned 2 skill points per lap. For example at the beginning or a 3 lap race a team would be assigned 6 skill points. Players use skill points instead of rolling a die in most cases. Players decide before rolling dice whether or not to use a skill point. Points do not need to be pre-assigned to a specific team member.
Car Construction.
When a player controls more than one driver he must assign 5 build points to one driver 4 to the other.
Dice Rolls.
Instead of rolling1d6 on tables roll 2d6. Higher rolls are always better. All tables have been adjusted to reflect the changes.
Advantage or Disadvantage.
When rolling with Advantage or Disadvantage roll 3d6 instead of 2. For Advantage add the highest 2 dice. For Disadvantage add the lowest 2 dice. In both cases ignore the 3rd die.
Down Force Settings (for winged cars).
Before assigning build points the player must choose the downforce of each car and use the corresponding row on the Performance Chart. The player must choose one of the following settings for each of their cars independently:
Down Force
Advantage
Disadvantage
Normal
None.
None.
Strong
Chance Table, Testing Brakes
Exceeding Acceleration and Top Speed
Weak
Exceeding Acceleration and Top Speed
Chance Table, Testing Brakes
Grid Order.
There are 4 grid groups. Cars in a lower numbered grid group will be placed on the starting ahead of cars in a higher numbered grid.
Step 1: Place all cars in a grid group based on their starting speed:
Start Speed
Grid Group
80mph
2
60mph
3
40mph
4
Step 2: Starting with cars in group 4, players may spend 1 wear point to move a car into the next lower numbered grid group. A car may only move down one grid from its starting group.
Step 3: Starting with the lowest numbered grid group containing cars, place cars on grid starting positions. If there is more than one car in a group, then the players roll 2d6 for each car. A player may spend a skill point to roll with Advantage. The car with the highest roll result is placed on the grid first. Tied cars will continue to roll off until the tie is broken. Spent wear and skill point are not available for the race.
Late Breaking.
To avoid a collision or slow down for a corner, a player may choose to reduce his written speed before moving. The speed reduction takes place in the space before the collision would occur or before a corner is entered. Consult the Deceleration Chart and add 20 to the total amount the car is over its Max Deceleration. Example: a car plotted to exceed Max Deceleration by 20mph and then late brakes an additional 20mph would check against the braking table as if it exceeded Max Deceleration by 60mph.
Pass Through.
When all lanes are blocked on a straightaway, instead of a collision a player may attempt to pass through one of the squares containing another vehicle. If not blocked, then the passing player may spend 1 wear or roll on the Pass Through Table. The player may spend a skill to roll with advantage.
The player being passed through may allow or attempt to block the pass through. If the player attempts to block, then the passing player may call off the passing attempt or continue. If the passer continues, then both players must roll on the Pass Through Table with Disadvantage (roll 3d6 add lowest 2). You may spend one skill point to nullify the Disadvantage.
Pass Through Table
2D6
Passer
Blocker
7-12
Successful Pass.
No effect
3-6
Spinout.
Spinout
2
Spinout and use one wear.
Spinout and use one wear
Corner Acceleration.
Players may accelerate a car starting on the last space of a corner (the last space with a speed limit). Cars starting in a corner, but not in the last space of a corner, may not accelerate. Cars that spin in a corner may accelerate using start speed on their next turn, even if they are not on the last space of the corner. Cars starting in the last space of a corner are not impacted by the space’s speed limit.
Slipstreaming.
Cars may use bonus spaces to enter or exit a corner.
Spinout – Car Placement.
Face the car in the opposite direction and off to the side of the track next to the space it spun. Spun cars do not block traffic. During the following turn, spun cars re-enter the track on one of the spaces in the row it spun in. If the spaces are occupied, then it must wait for cars in those spaces to move before re-entering the track.
Long Tracks.
If 1 lap of a track is equal to or exceeds the length of an average 3-lap race and one lap is planned, then calculate Wear and Skill points as if the race was 3-laps. This rule applies to tracks like Steve’s realistically long Nurbergring.
Scoring.
During a race, the first car to complete the 1st lap receives a bonus point. The first car to complete the 2nd lap also scores a bonus point. All cars that complete a race score points. Cars that do not finish the race do not score points (unless they earned bonus points for leading laps 1 or 2). If 12 or fewer cars start a race use the following formula to determine finishing points: 1st = Number of Cars +3; 2nd = Number of Cars +1; 3rd the Number of Cars -2; 4th = Number of Cars -3; 5th = the number of cars -4; etc. Continue this pattern. If more than 12 cars start a race, then use 12 for the Number of Cars in the above formula. Cars finishing beyond 12th place receive 1 point.
Nine teams completed in the South African Grand Prix at Kyalami. Ferrari and Surtees started in the first row followed by Elf Tyrrell and BRM. Embassy made its debut in the third row accompanied by McLaren. Shadow and Hesketh shared the fourth row. Brabham was alone in the fifth row.
Pace took and early lead followed closely by Lauda. Hill stalled on the start and fell behind. Fittipaldi launched his McLaren into 3rd place.
The Ferrari and the Surtees raced side-by-side for most of the 1st lap, but Pace in the Surtees held the lead. The rest of the field formed a conga line through the Esses.
Pace complete the lap first and picked up a bonus point. Beltoise catapulted his BRM into 3rd place and pressured Lauda. Hunt nursed his ailing Hesketh and fell back.
Beltoise slipped into 2nd, but Lauda soon recaptured the position. McLaren and Shadow fought for 4th.
While extending his lead, Pace completed the 2nd lap and gained another bonus point. Lauda pushed his Ferrari trying to close the gap between him and Pace. Revson, Scheckter, and Reutermann raced 3-wide down the front straight.
During the 3rd and final lap Fittipaldi spun twice and lost his position. Lauda caught up to Pace and they raced side-by-side through the Esses, the Bend and down the front straight. Although his was out of wear, Lauda charged through the kink at 140mph and crossed the finish line first for a photo finish win.
Beltoise the rest of the pack to take 3rd place. Reuterman, Revson, and Scheckter once again raced three wide down the front straight. Scheckter skid going through the kink. Revson finish fourth beside Reutermann. Race details follow:
1st Den H. (C. Regazzoni) 80/40/20/160/5 S 2nd Tom V. (C. Pace) 80/20/40/140/6 W** 3rd Ray R. (J-P. Beltoise) 60/40/40/160/5 S 4th Tori P. (P. Revson) 40/40/60/160/5 S 5th Dave M. (Reutermann) 40/60/60/140/5 S 6th Mike C. (G. Hill) 60/40/40/160/5 N 7th Chuck H. (J. Scheckter) 60/40/20/160/6 N 8th AJ H. (E. Fittipaldi) 80/40/40/140/5 S 9th Steve K. (J. Hunt) 60/40/40/160/5 S
The Tabletop Racing club returned to Interlagos after a six year absence. Eight Teams filled out the grid including: UOP Shadow, Ferrari, Brabham, BRM, March, McLaren, JP Lotus, and Surtees.
Regazzoni launched his Ferrari off the starting line and into first place. He was challenged by Shadow’s Revson and Brabham’s Reutermann. Pace also got a good start moving from 8th to 6th going into Curva 1. The Surtees displayed superior acceleration.
Regazzoni, Reutermann, and Revson battled for the lead positions. Pace blasted down the straightway and captured the 4th position and by Curva 4 he was in 3rd! All the drivers were pushing their cars to the limit.
In order to avoid a collision, Fittapaldi spun his McLaren before the Ferradura. The field split in two with Beltoise leading the second group.
Pace got around Reutermann and Regazonni and was first across the line gaining the first lap bonus point. The Ferrari and the Brabham were taking a beating and showed signs of wear.
Pace quickly extended his lead. Regazonni couldn’t catch Pace, be he also stayed ahead of the pack. Revson and Reutermann slip back while Brambillo moved his March up.
Pace developed an insurmountable lead and won the race – going from last to first!
Congratulations Tom V.
Next race will be at Kaylami on 9 March 2024. Race details follow:
1st Tom V. (C. Pace) 40/60/40/180/4 S* 2nd Den H. (C. Regazzoni) 80/40/20/160/5 S 3rd Tori P. (P. Revson) 60/40/40/160/5 W 4th Dave K. (V. Brambilla) 40/60/40/160/5 S 5th Dave M. (Reutermann) 60/40/40/160/5 S 6th AJ H. (E. Fittipaldi) 60/40/20/160/6 S 7th Ray R. (J-P. Beltoise) 60/40/40/140/6 S 8th John H. (R. Peterson) 60/40/20/160/6 S
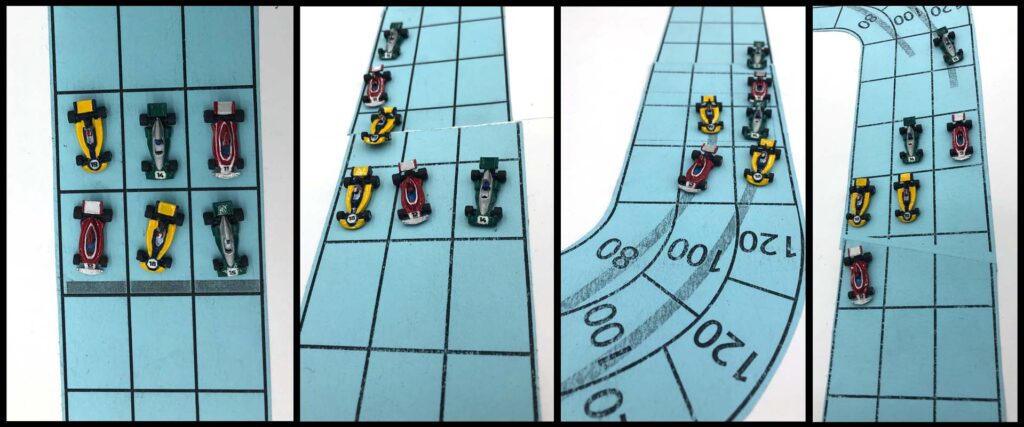
Two rookie along with six veteran team managers fielded drivers for this years race on the spectacular Buenos Aires circuit. Chuck took the helm of Elf Tyrell while Tori, the second rookie, became Shadow’s leader. AJ accepted an offer to take over McLaren and Den filled the vacancy at Ferrari.
Team Surtees driver Pace held the pole position and shared the front row with Ferrari driver Lauda. BRM’s Beltoise and Elf Tyrrell’s Scheckter occupied the second row. Hesketh’s Hunt appeared a bit impatient sitting in the 3rd row and Shadow’s Oliver was ready to race. The last row was shared by McLaren’s Fittipaldi and Lotus’ Peterson.
Pace and Lauda set a blistering pace during the first lap. Pace could not escape Lauda. Fittipaldi and Hunt also got a good start weaving their way through the pack. Fittipaldi was exceptionally quick moving from last to 3rd place by the end of the front straight.
Lauda slipped by Pace, got through the Curva de Parge Horquilla ahead of the pack, and passed the start finish line to collect the 1st bonus point gaining a formidable lead. Peterson and Hunt battled each other as they struggled to catch the leaders. Meanwhile Fittipaldi was stuck between Oliver and Scheckter, the two rookie managed team cars.
The 1st laps dynamic was repeated in the second. Lauda extended his lead while Pace chased him. Hunt followed closely behind Peterson. Fittipaldi got ahead of Schecter and Oliver, but could shake them.
During the last half of the 2nd, Pace closed the gap between him and Lauda, but Lauda was once again first to enter the front straight. Hunt and Peterson were neck and neck. Schecter moved by Fittipaldi. BRM driver Beltoise waited to make his move.
At the beginning of the 3rd lap, most of the cars showed signs of extensive wear. Luada was first across the start/finish line to gain the 2nd bonus point, but was not able to extend his lead as the pack reeled him in. Schecter catapulted by Hunt down the front straight and Hunt scrambled to regain the position.
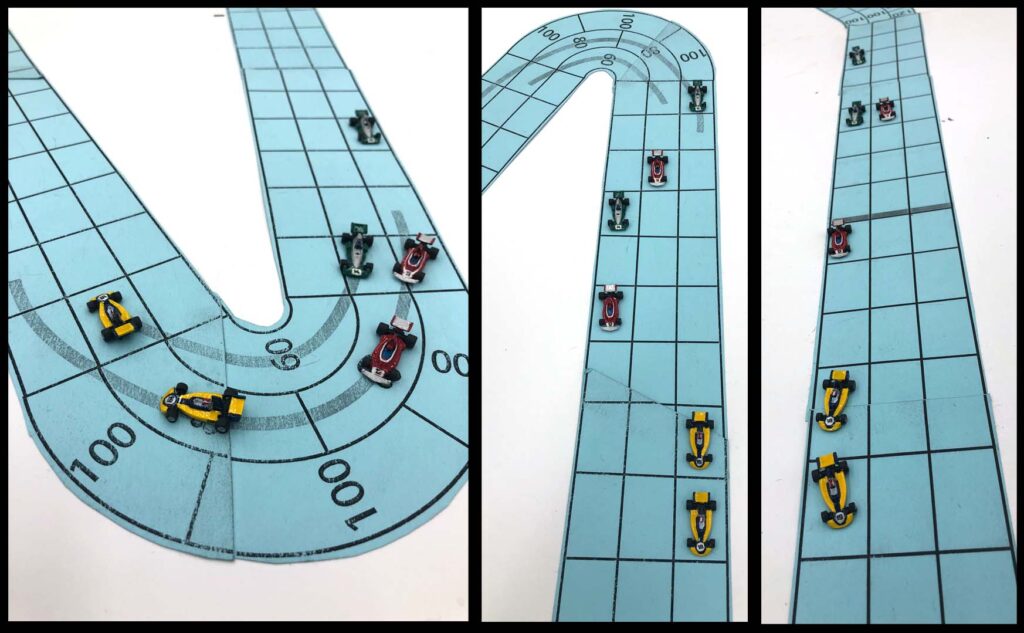
A series of events made the race very interesting. Lauda skidded through the Entrada and Pace captured the lead. Peterson pulled up beside Lauda. Lauda charged into the Cajon and spun-out blocking the racing line. Schecter spun-out to avoid hitting Peterson and Fittipaldi spun-out in the Entrada. Exiting the Cajon, Pace was in the lead followed by Peterson. Hunt was in a drag race with Lauda. Beltoise passed Fittipaldi and pressured Oliver. The race had changed in the blink of an eye.
The leaders raced toward the Curva de Parga Horquilla, the last series of corners, with hardly and wear points. Pace made it through the last corner perfectly and was set to accellerate down the front staight the next turn with Peterson stuck behind him in the corner. Then Lauda made a daring move, he out braked Hunt and took the inside line to position his Ferrari next to Pace.
Lauda and Pace launch out of the last corner. The Ferrari’s engine began to sputter and lose power.
Meanwhile in the back of the pack, Fittipaldi attempted to out brake Beltoise but his brakes failed and his McLaren slid of the track just inches away from the retaining wall.
Lauda and Pace were side by side before the finish line and Lauda’s Ferrari trailed thick smoke. Pace crossed the finish line first to take the win. Lauda finished 2nd followed by Hunt and Peterson.
Race details follow:
1st Tom V. (C. Pace) 80/20/20/160/6 W 2nd Den H. (N. Lauda) 80/40/20/160/5 S** 3rd Steve K. (J. Hunt) 60/40/40/160/5 S 4th John H. (R. Peterson) 60/40/20/160/6 S 5th Chuck H. (J. Scheckter) 60/40/20/160/6 S 6th Tori P. (P. Revson) 40/40/60/160/5 S 7th Ray R. (J-P. Beltoise) 60/40/20/160/6 S DNF AJ H. (E. Fittipaldi) 60/40/40/160/5 S